Last month we discussed a little bit about what National Instruments DAQmx and Measurement Studio are and how they can be used to create .NET applications which leverage National Instruments data acquisition hardware. This month we are going to jump in to a high-level practical explanation on how to get started doing data acquisition in .NET.
Once you have Measurement Studio installed and activated, you should see it available in the menu bar of Visual Studio. Start a new project and choose ‘Measurement Studio’ and ‘NI Windows Forms Application’ as the project type in the language you want to use to develop.

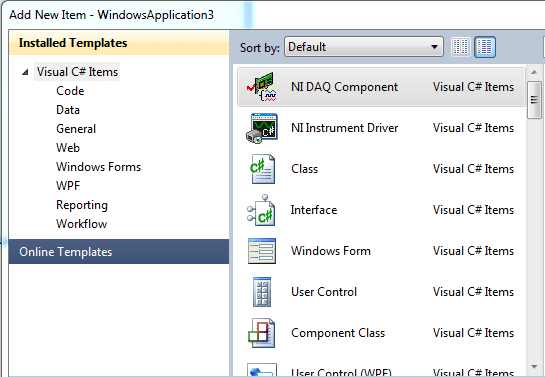
Once your project is created and a blank form is available, you are going to want to create your first DAQ task to gather some data. To add a DAQ Task to the project, you will want to go to Project -> Add new Item and select NI DAQ Component. Choose to create a new project task and add it to the project.
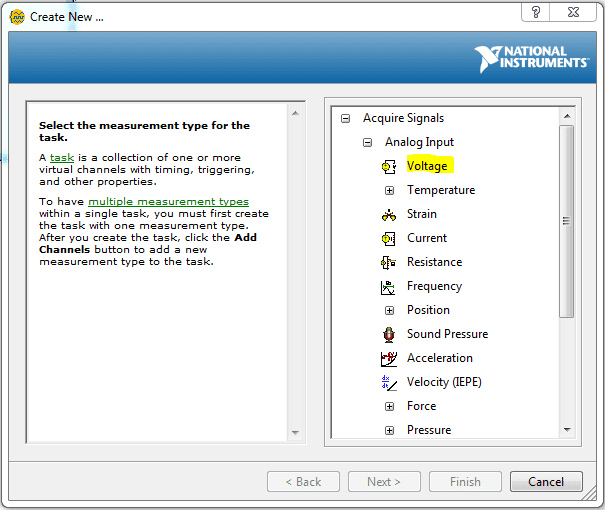
A window will appear asking you to select what type of task you want to create. You can create a task that can acquire or generate analog, digital, or counter inputs and outputs. For the purposes of this demonstration, I am going to select to acquire an analog input voltage signal. Then, you will need to select the physical channels you want to read or write the signals from or to. If you have virtual devices set up in NI MAX, you can select them as the physical devices you want to use.
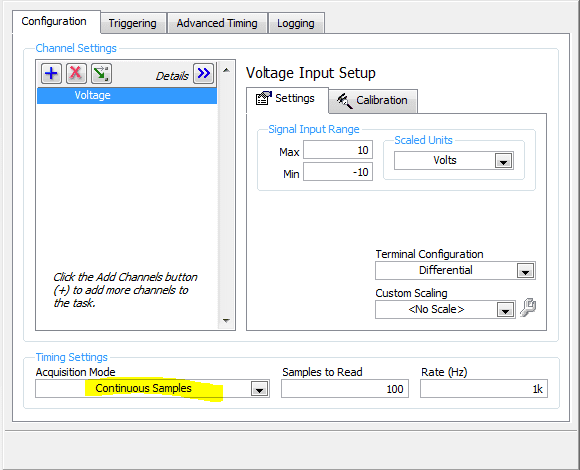
The GUI will now show a window so you can configure the DAQ task that you have created. For demonstration purposes, select Continuous Samples under Task Timing.
Once you have the task configured the way you want it, you can hit the Run button in the upper menu section of the window. You will see a graph that is moving because the sample set is continuous.
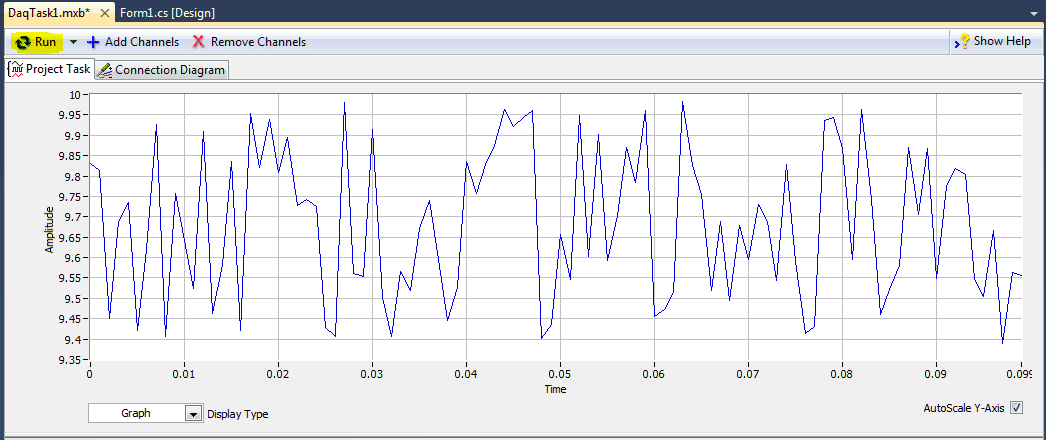
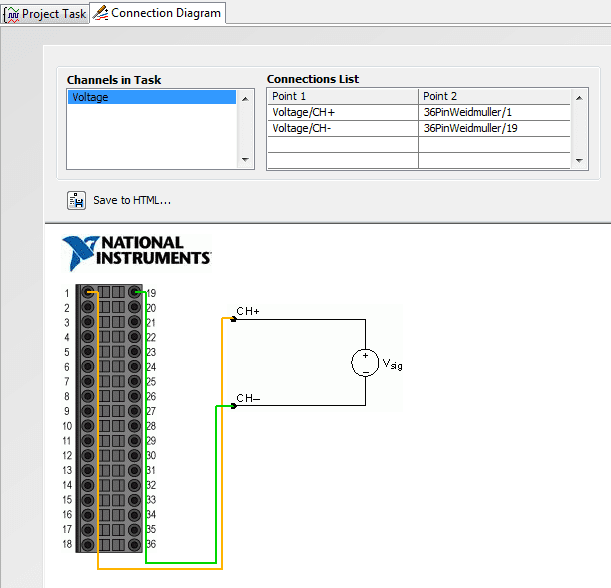
The Connection Diagram tab of the DAQ Task window will even show you which physical pins of the measurement device you are reading from.
You can easily reconfigure your task if needed at any time using DAQ Assistant by right-clicking the DaqTask in the Solution Explorer and choosing View Assistant.

Now that you are reading a signal from hardware, you are going to want some means of displaying it on the screen. Go to the design view of the default form (Form1.cs) that was created with your project. Make sure that your toolbox has a Measurement Studio controls section in it and drag a DaqComponent control onto the user interface. Select the DaqTask you just made to finish creating the DaqComponent.

Right-click the DaqComponent and choose to Generate UI.

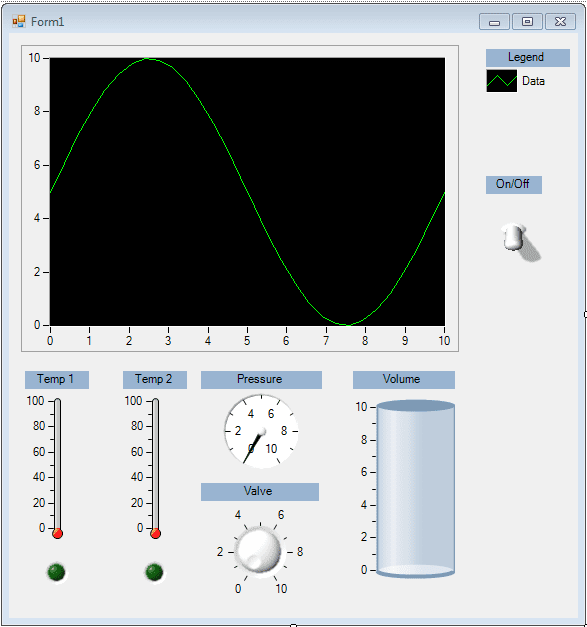
A waveform graph and on/off switch should be generated automatically for you. Select finish and the DAQ UI will now appear on your form and can be resized or moved around. Run your project and hit the switch and you should see your incoming signal on the graph.

If you would prefer to write your own code to generate the UI, rather than relying on the auto-generated UI you can do that too. I am going to use the auto-generated code as an example of how you can modify it to write your own.
First, you will need to write an event for starting and stopping your data acquisition. You can use the .StartRead() and .StopRead() functions to do this. The auto-generated code has this tied to a switch’s StateChanged event.

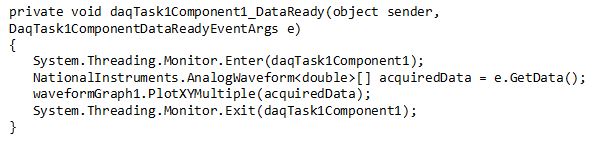
Once your DAQ is started, you will need some code to display it on the waveform graph or wherever you would like it displayed or analyzed. You can do this in the _DataReady event. What this code is doing is monitoring the task, and putting the data into an AnalogWaveform data type. That variable is fed into the WaveFormGraph and plotted.
You can use different types of graphs or indicators to display the data differently if you want to. There are lots of different NI controls and indicators available to use in displaying and controlling data acquisition and they are all in the Measurement Studio toolbox section. A reference to all the control namespaces can be found here for more documentation on how to implement each one of them in a Windows application: http://zone.ni.com/reference/en-XX/help/372636F-01/TOC3511.htm
This was a very basic introduction on getting up and running with DAQ in Visual Studio. Next month I will discuss some applications that can be created using .NET and LabVIEW together as a way to fully utilize National Instruments hardware while retaining the advantages of .NET.
Comments are closed.